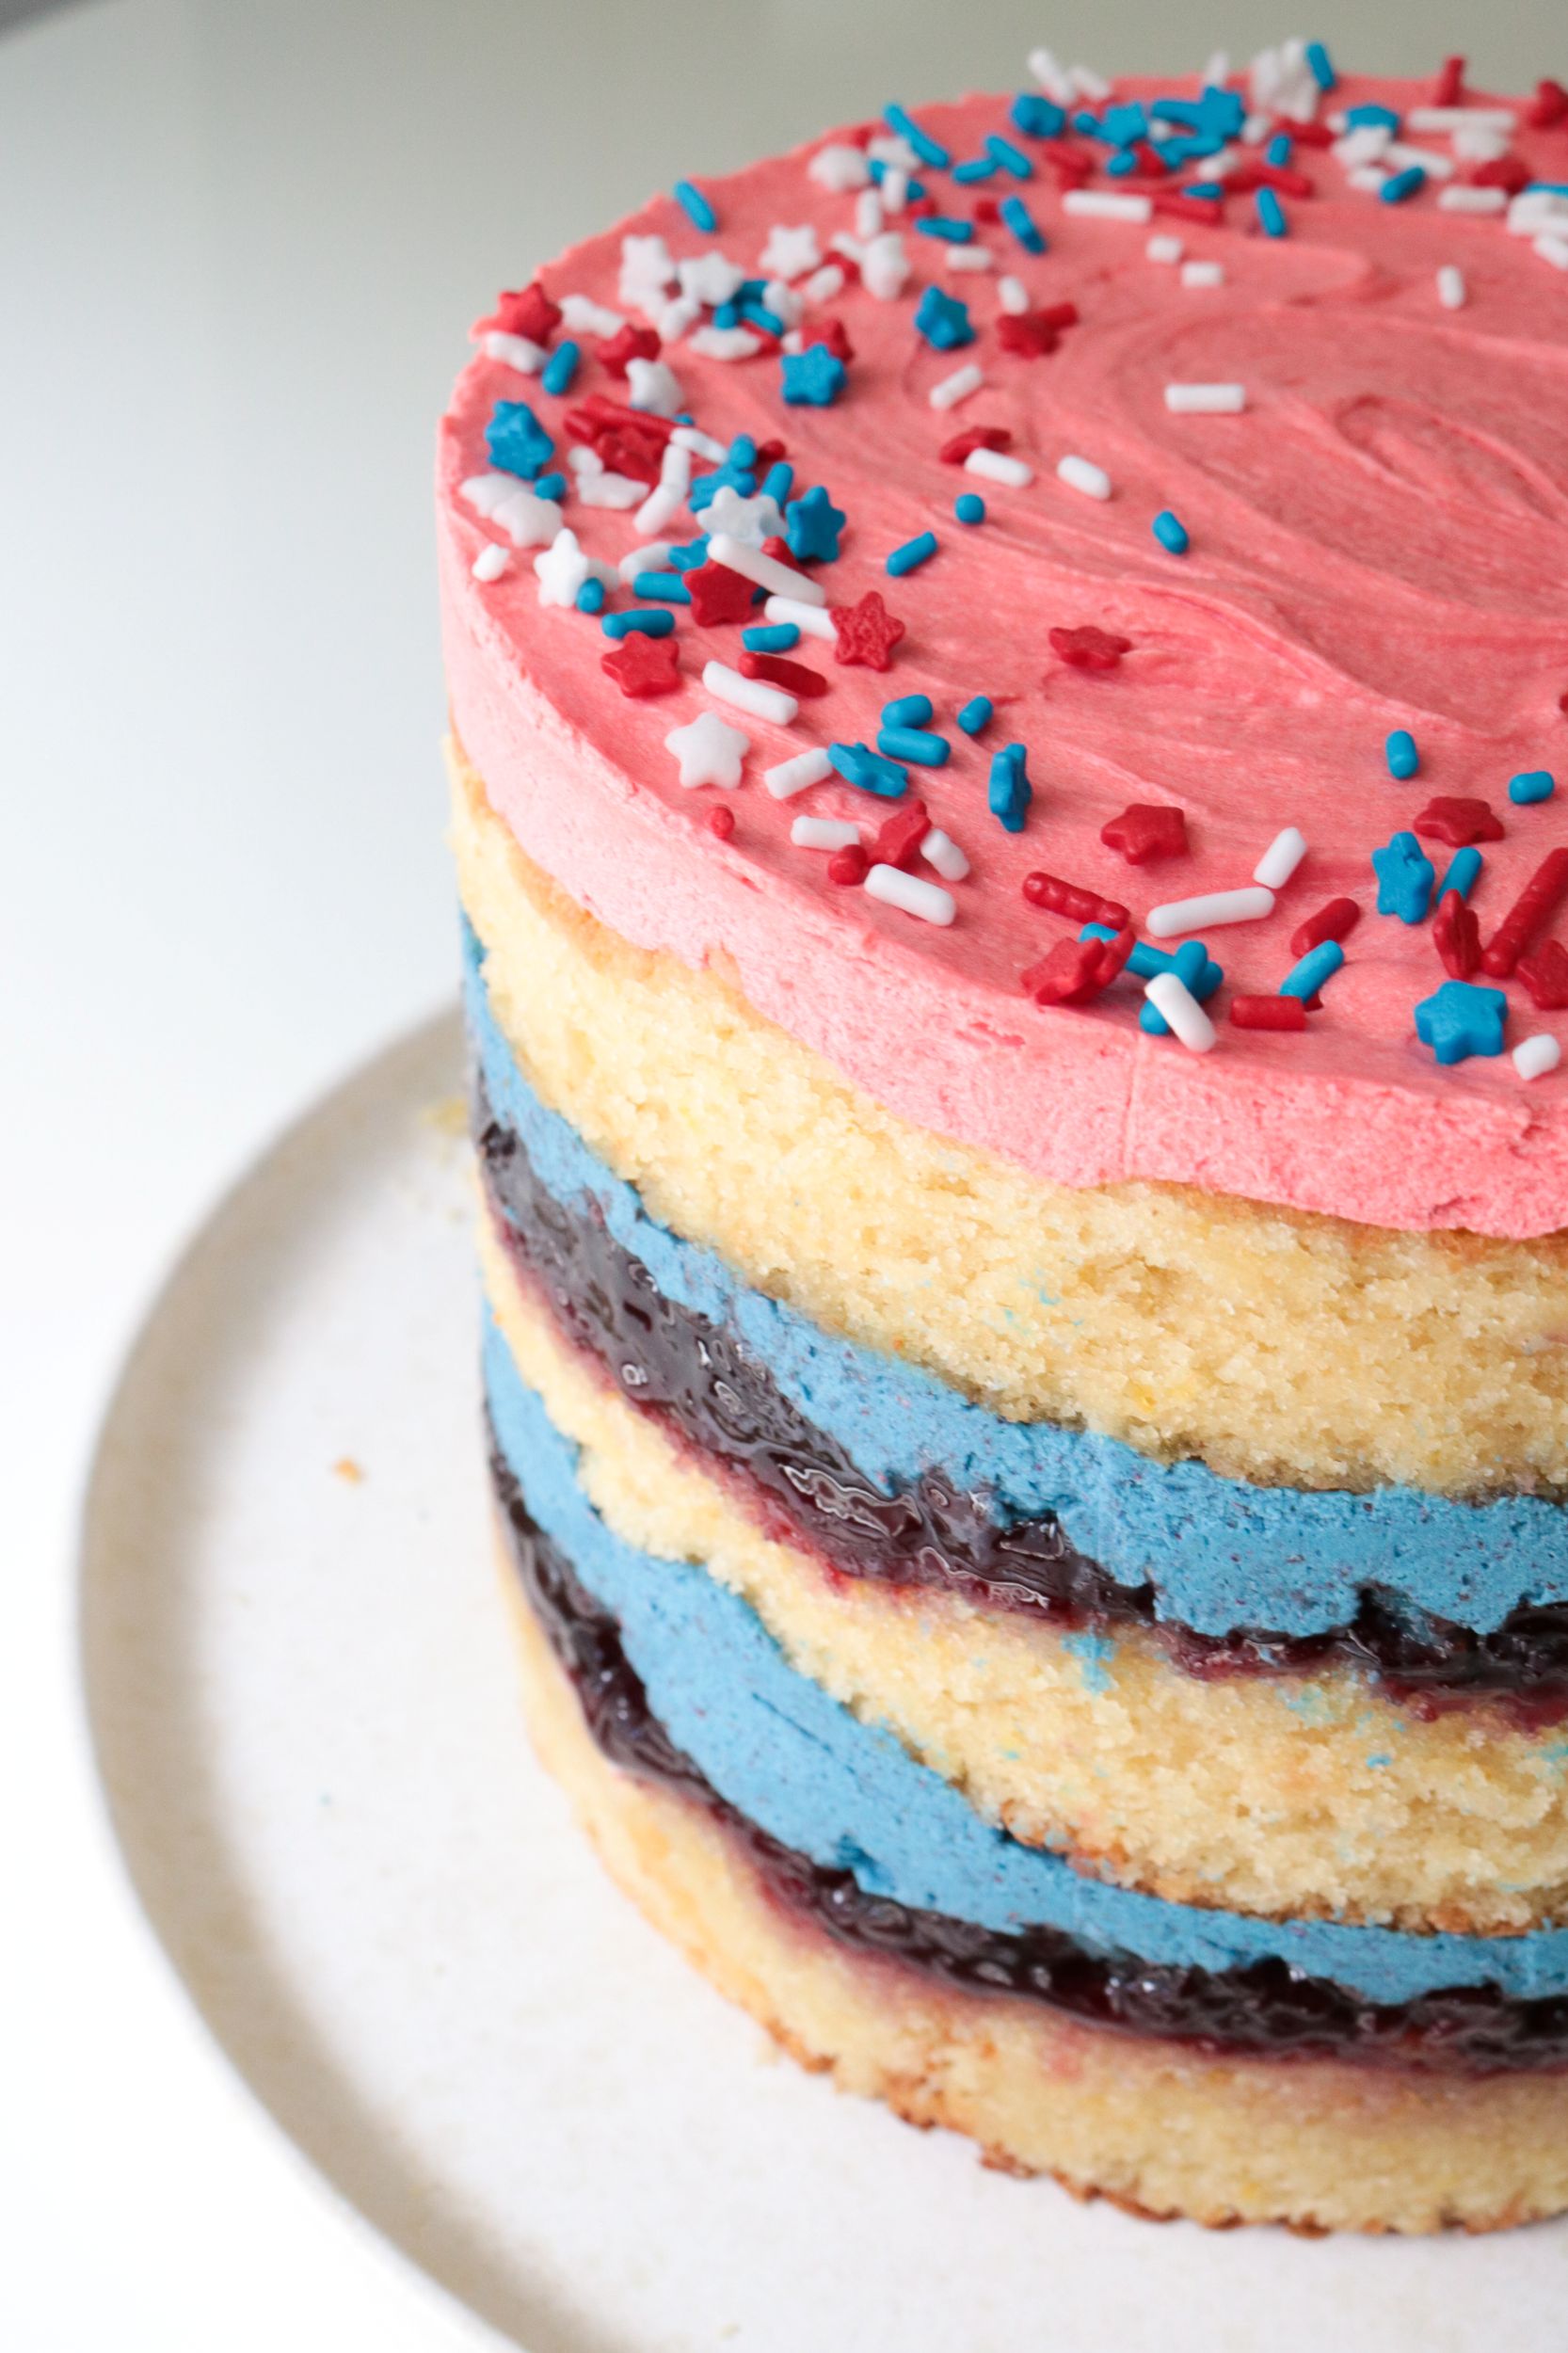
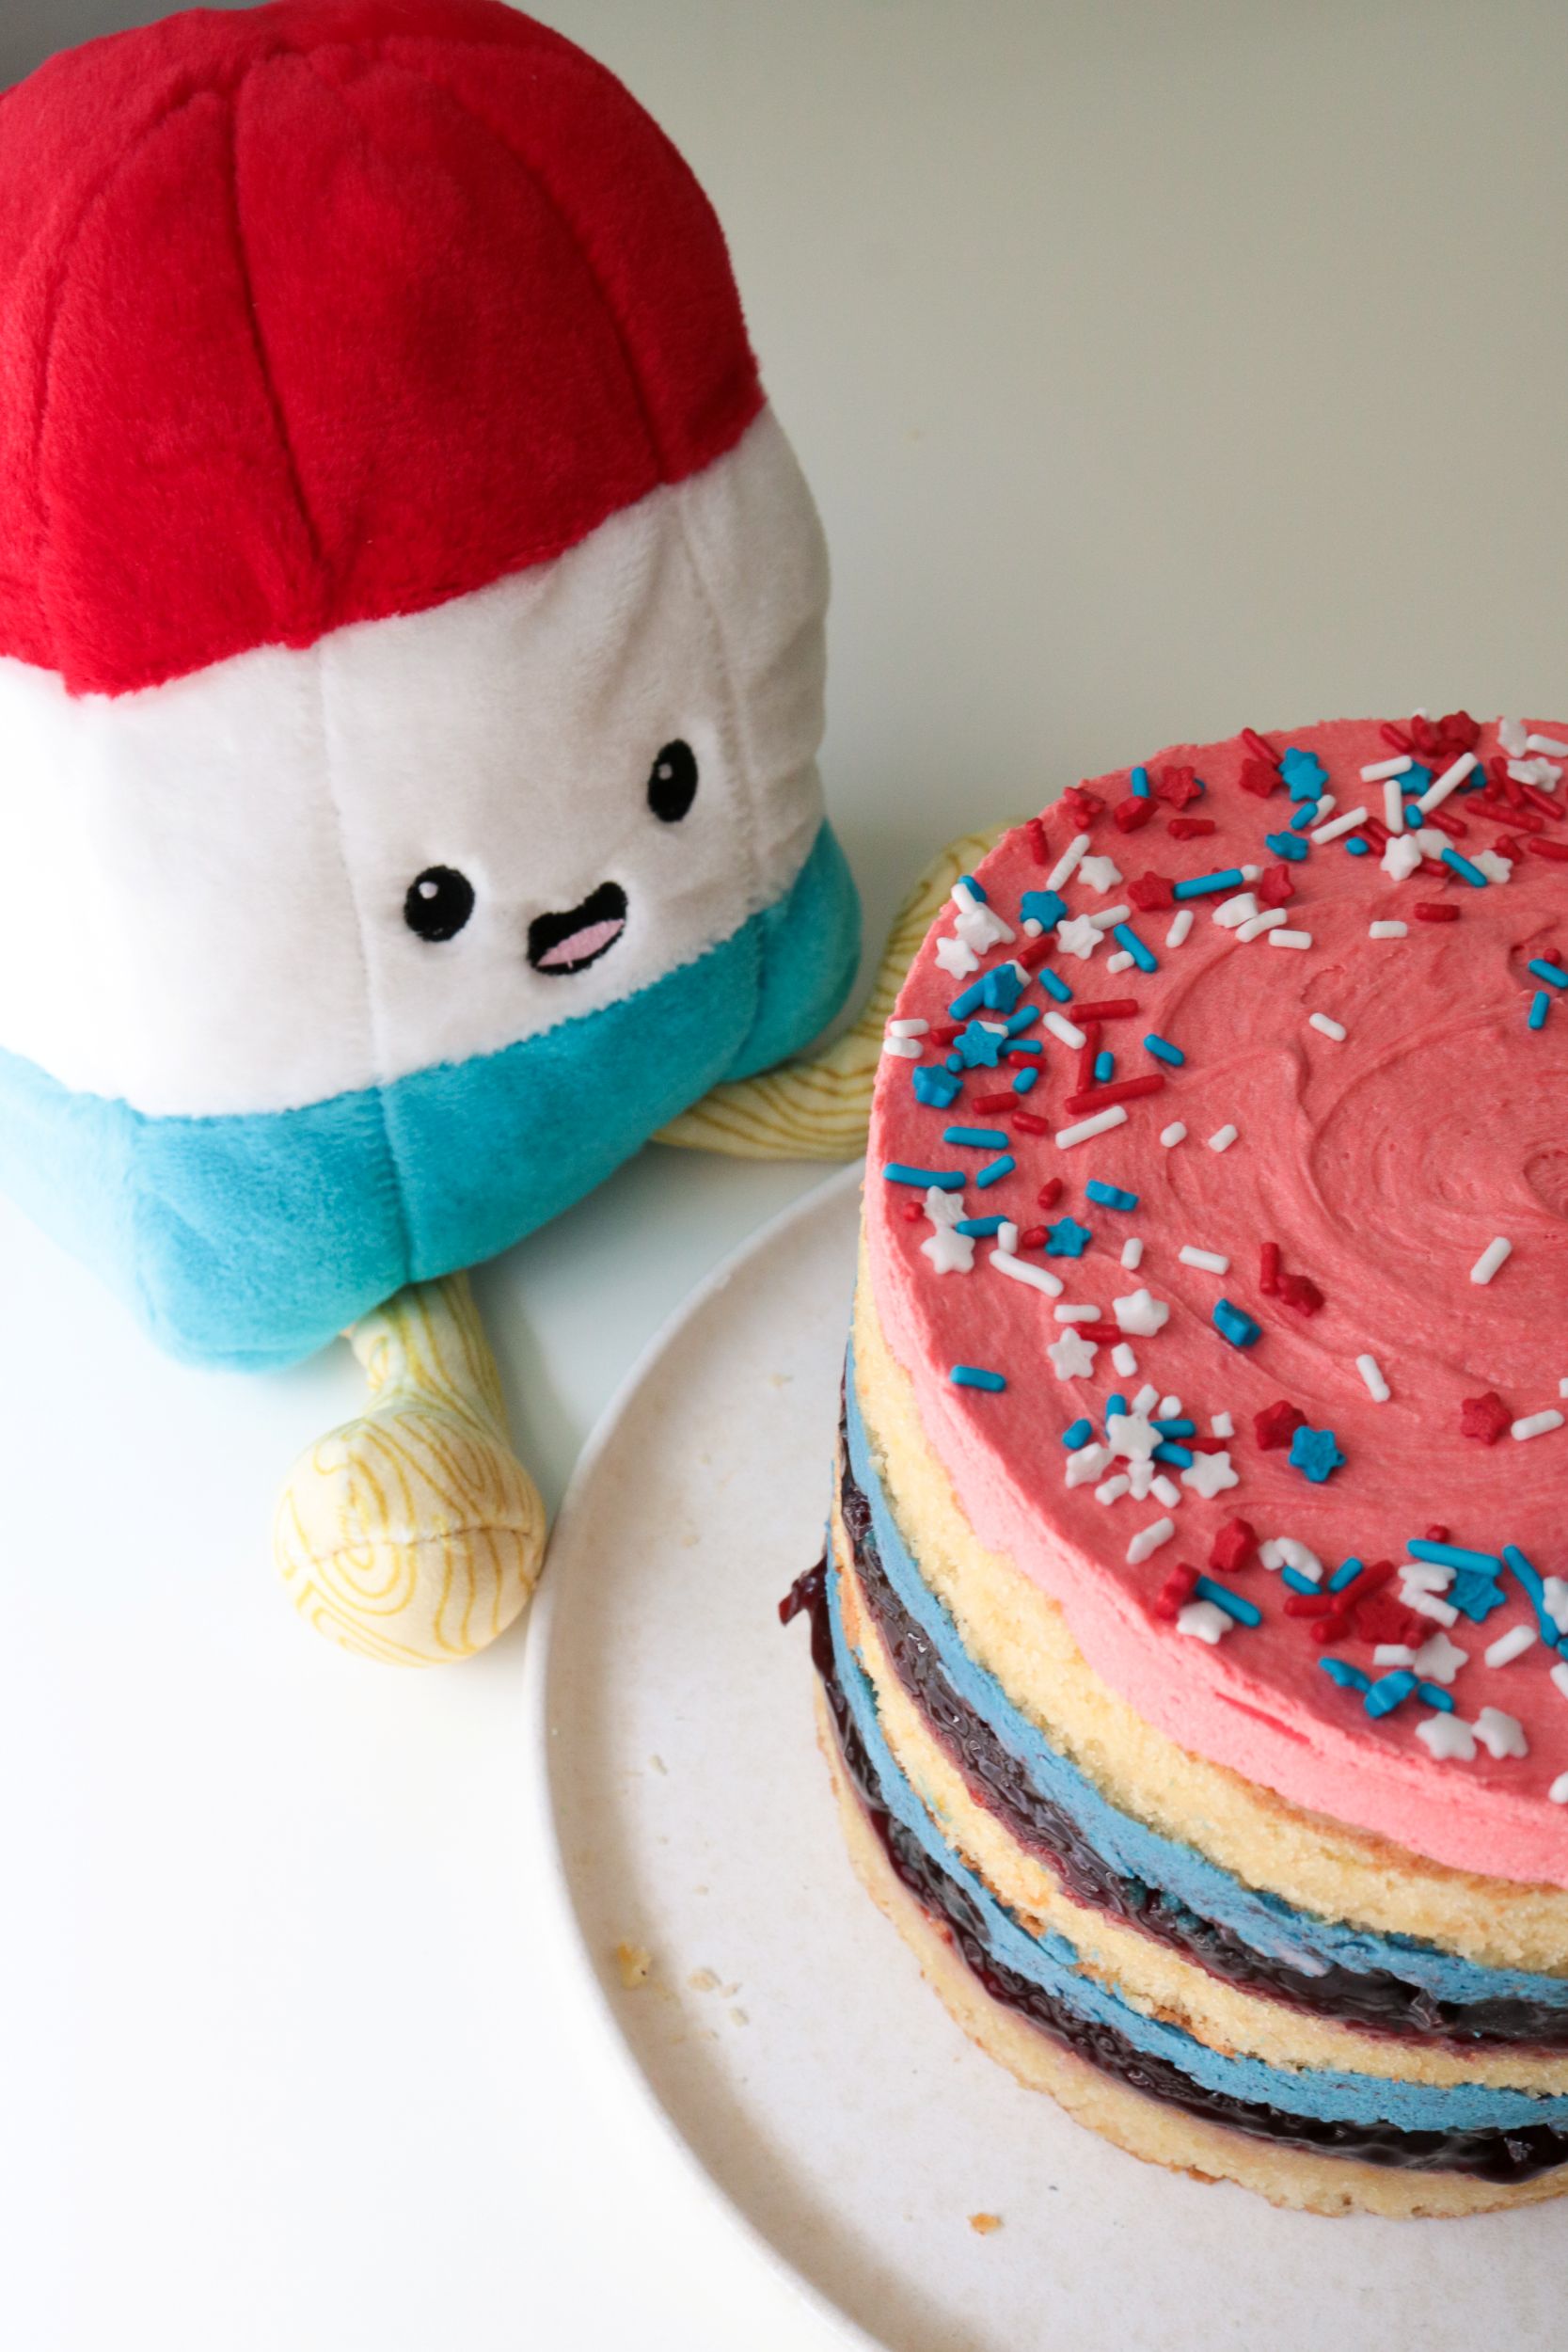
Bomb Pops are the ultimate nostalgia treat, and I’ve been glad to see them start getting their due in recent years. There’s all sorts of bomb-pop flavored energy drinks and sparkling waters and seltzers. And while those may be a bit gimmicky, I won’t complain to see the flavor offered! There’s something about those flavors that work just so well even, or maybe especially, as artificial flavors. But this Bomb Pop Cake is not artificial in any way! I tried to capture the bomb pop flavor by just combining the lemon, cherry, and raspberry flavors that make the popsicle.
But, I made a startling discovery in the process of writing this post. I may have gotten the flavors wrong! According to the Original Bomb Pop, the white flavor is lime!! I had always thought it was lemon. And I’m not crazy, because Popsicle brand makes Firecracker popsicles that have lemon. But when my brother said he thought it was lime, I told him he was wrong without batting an eye.
I have, perhaps, failed my country. I would like to formally apologize for my error and hubris. Please do not cancel me. This cake still tasted good.
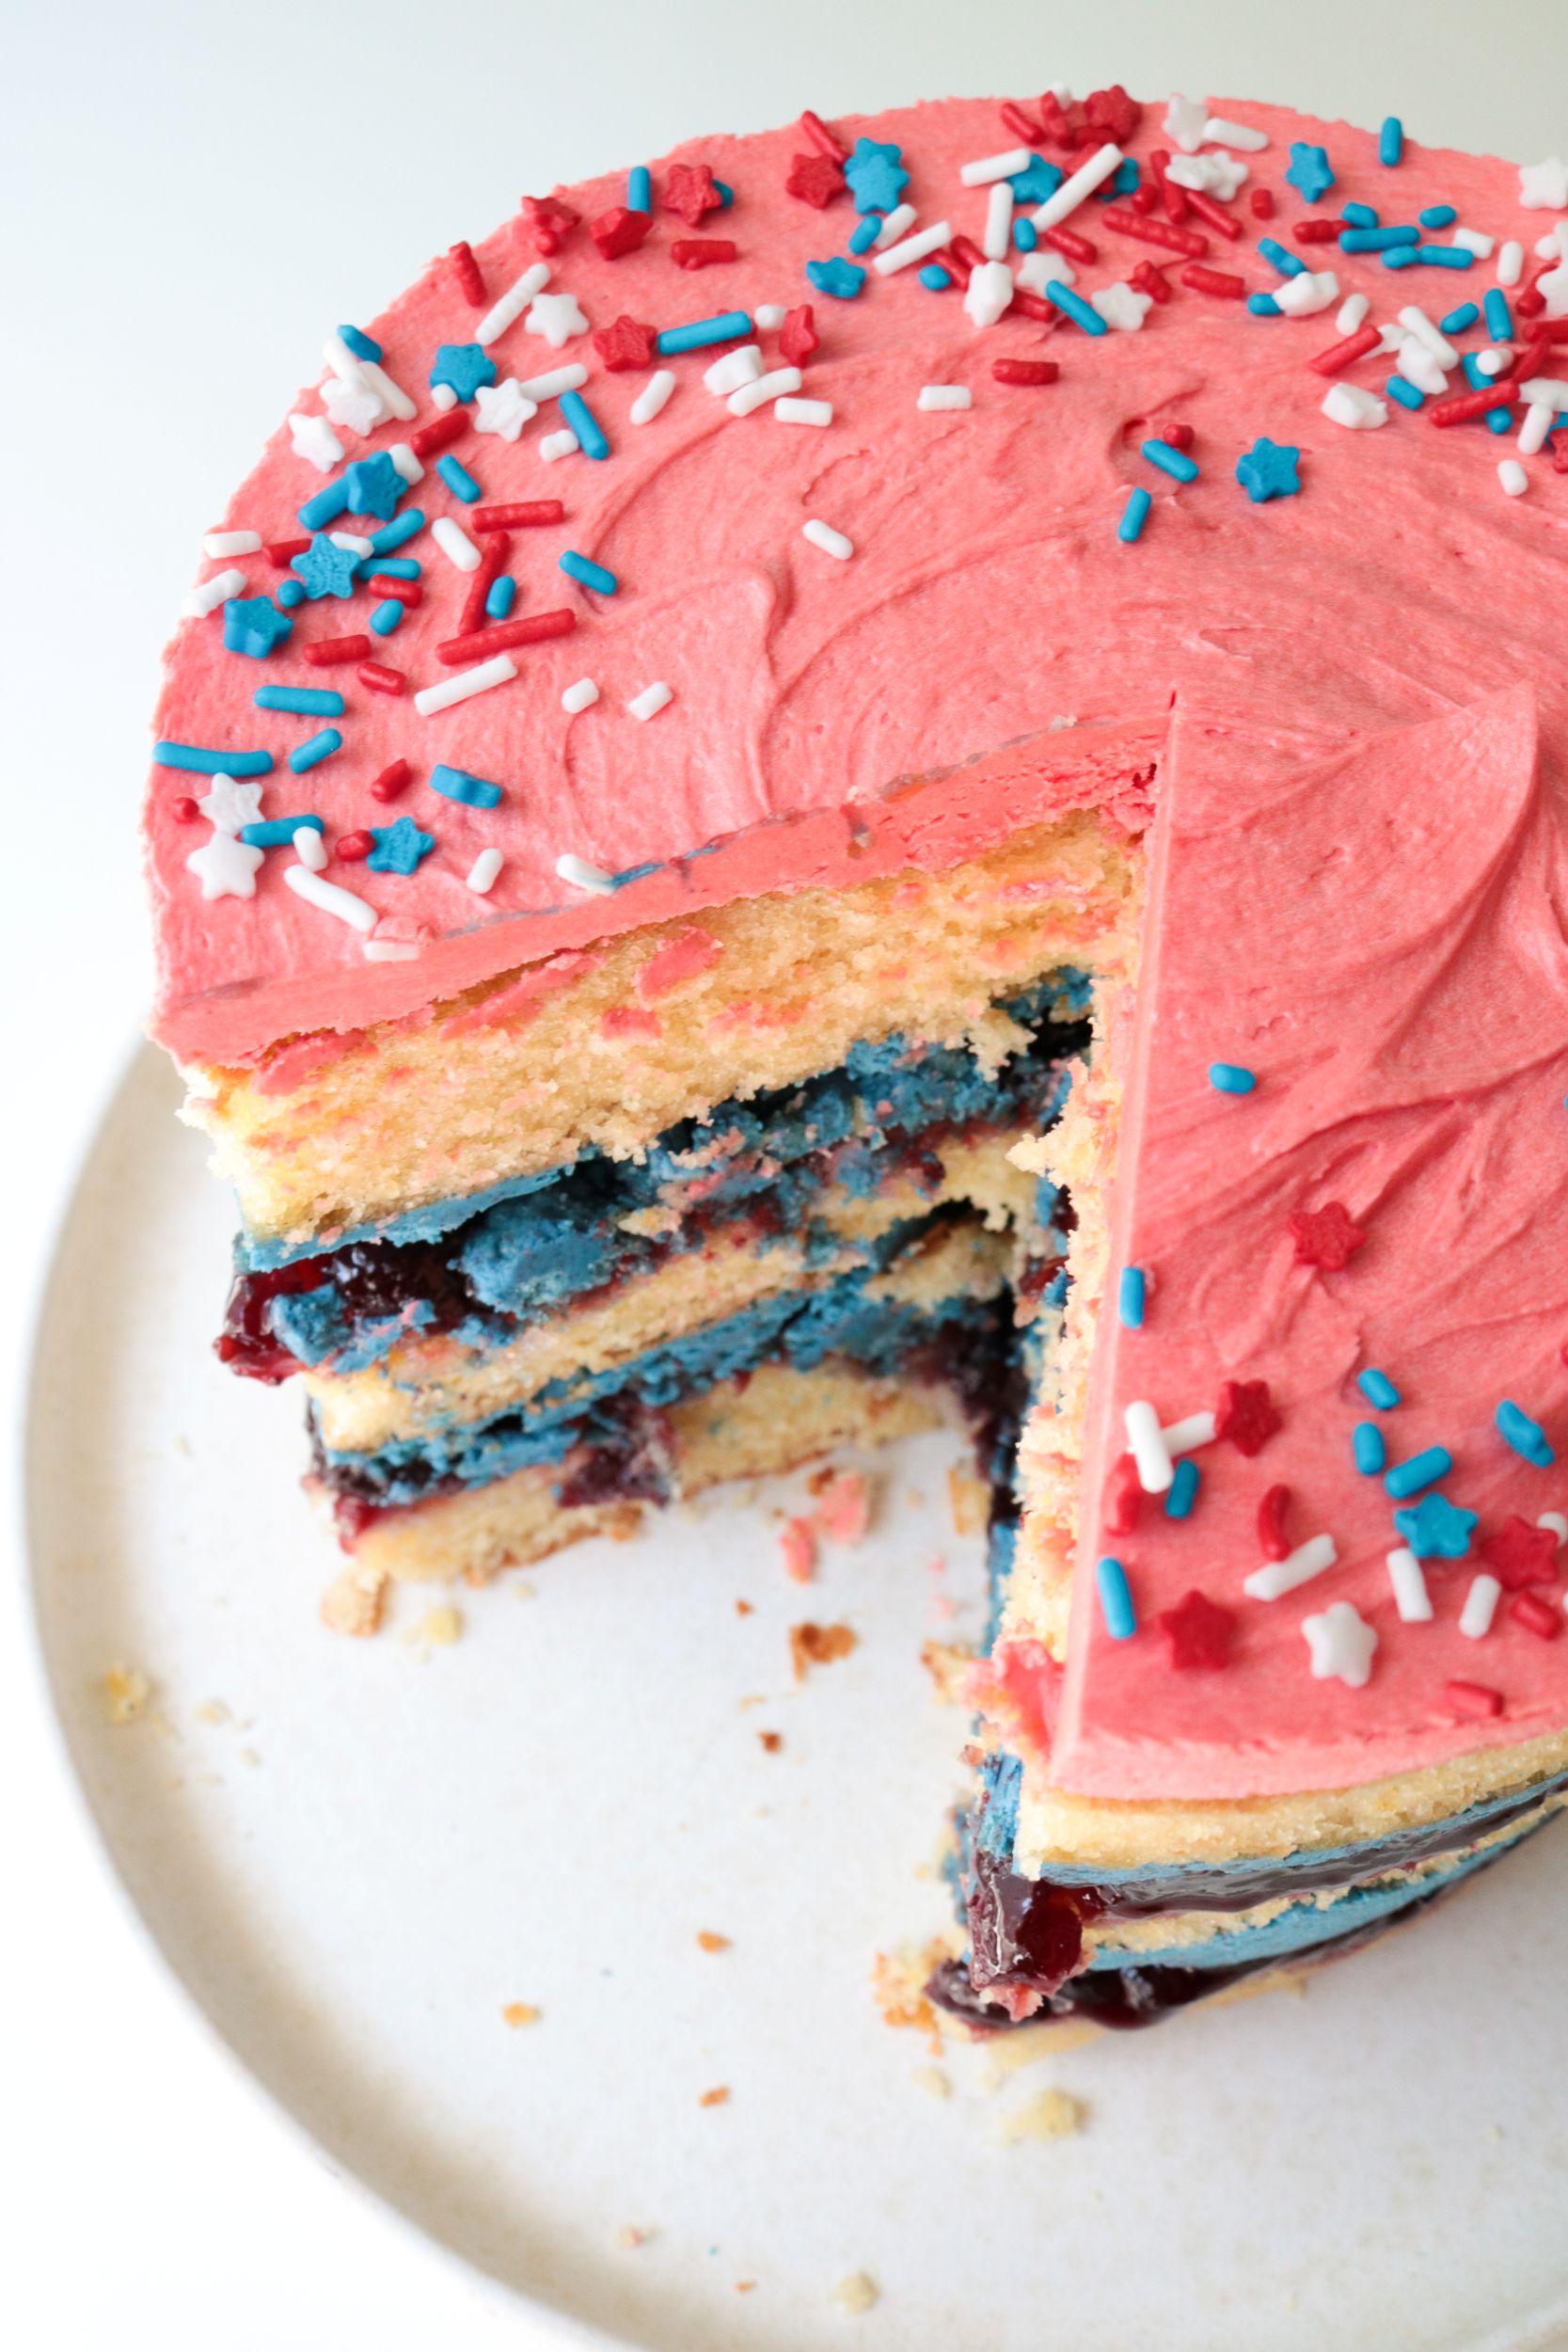
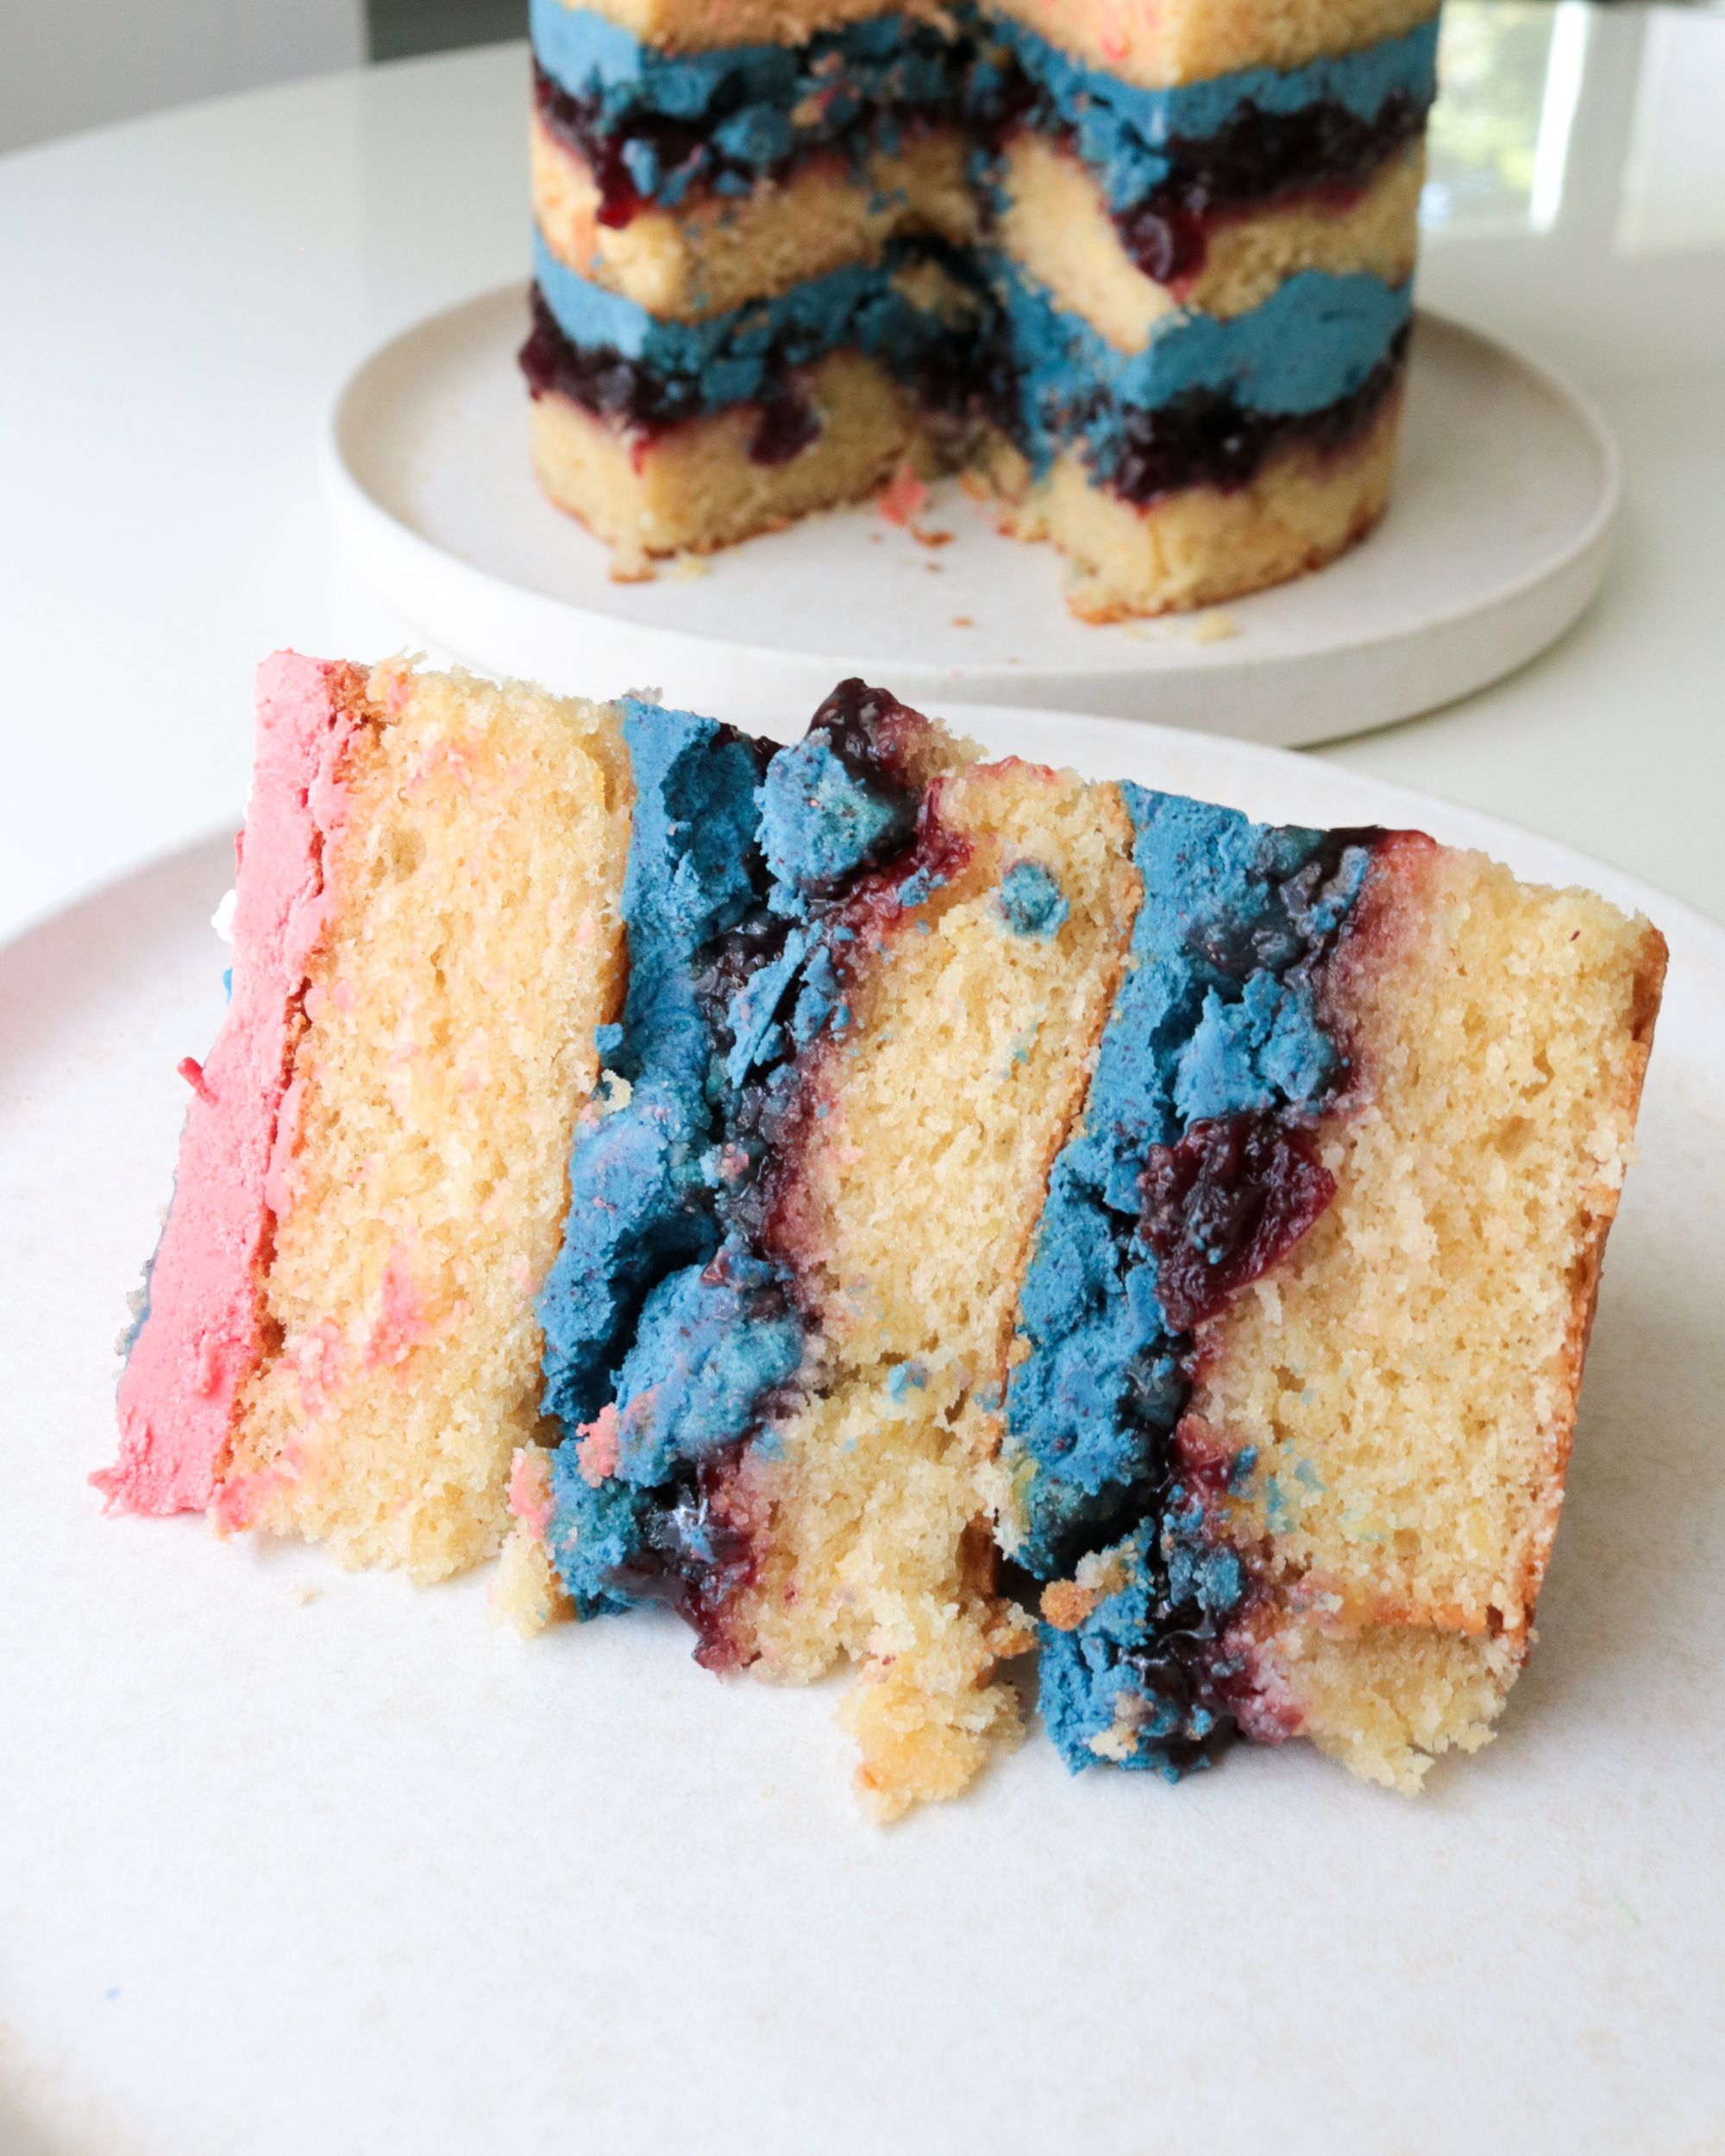
I, of course, dyed the raspberry parts blue, to be authentic to the Bomb Pop colors. That is the most important part of the popsicle, after all. In a Bomb Pop, I think the lemon is the most true-to-natural flavor, and it’s very strong. The blue raspberry tastes good, and then the cherry has the most artificial/candy taste to it. In this cake, I just used cherry jam, so it didn’t get the artificial cherry taste. But I think it tastes a bit more “grown up” and makes the cake taste a bit more gourmet than the popsicle!
I would argue, if you want the perfect Bomb Pop flavor… eat one! If you want Bomb Pop cake… then spend two days putting together the components and enjoy a bit of an elevated experience. Both are great.
I really liked the way these flavors came together for the cake! Shocker that this is a winning flavor combo. And I was pleasantly surprised by how the blue raspberry elements turned out. I know, in my brain, that blue raspberry is just raspberry dyed blue. But in my heart, it tastes different. And somehow, I felt that even when I made it myself it tasted different.
I think the decoration could have been even more elaborate. My brother was coming up with all sorts of ways that cupcakes or cakes could be decorated as an homage to the original popsicle. This idea started as an idea for decorating cupcakes, and then spiraled into a full cake when I started brainstorming. So there’s a lot of ways you could change up the decoration, if cake decorating is your forte.
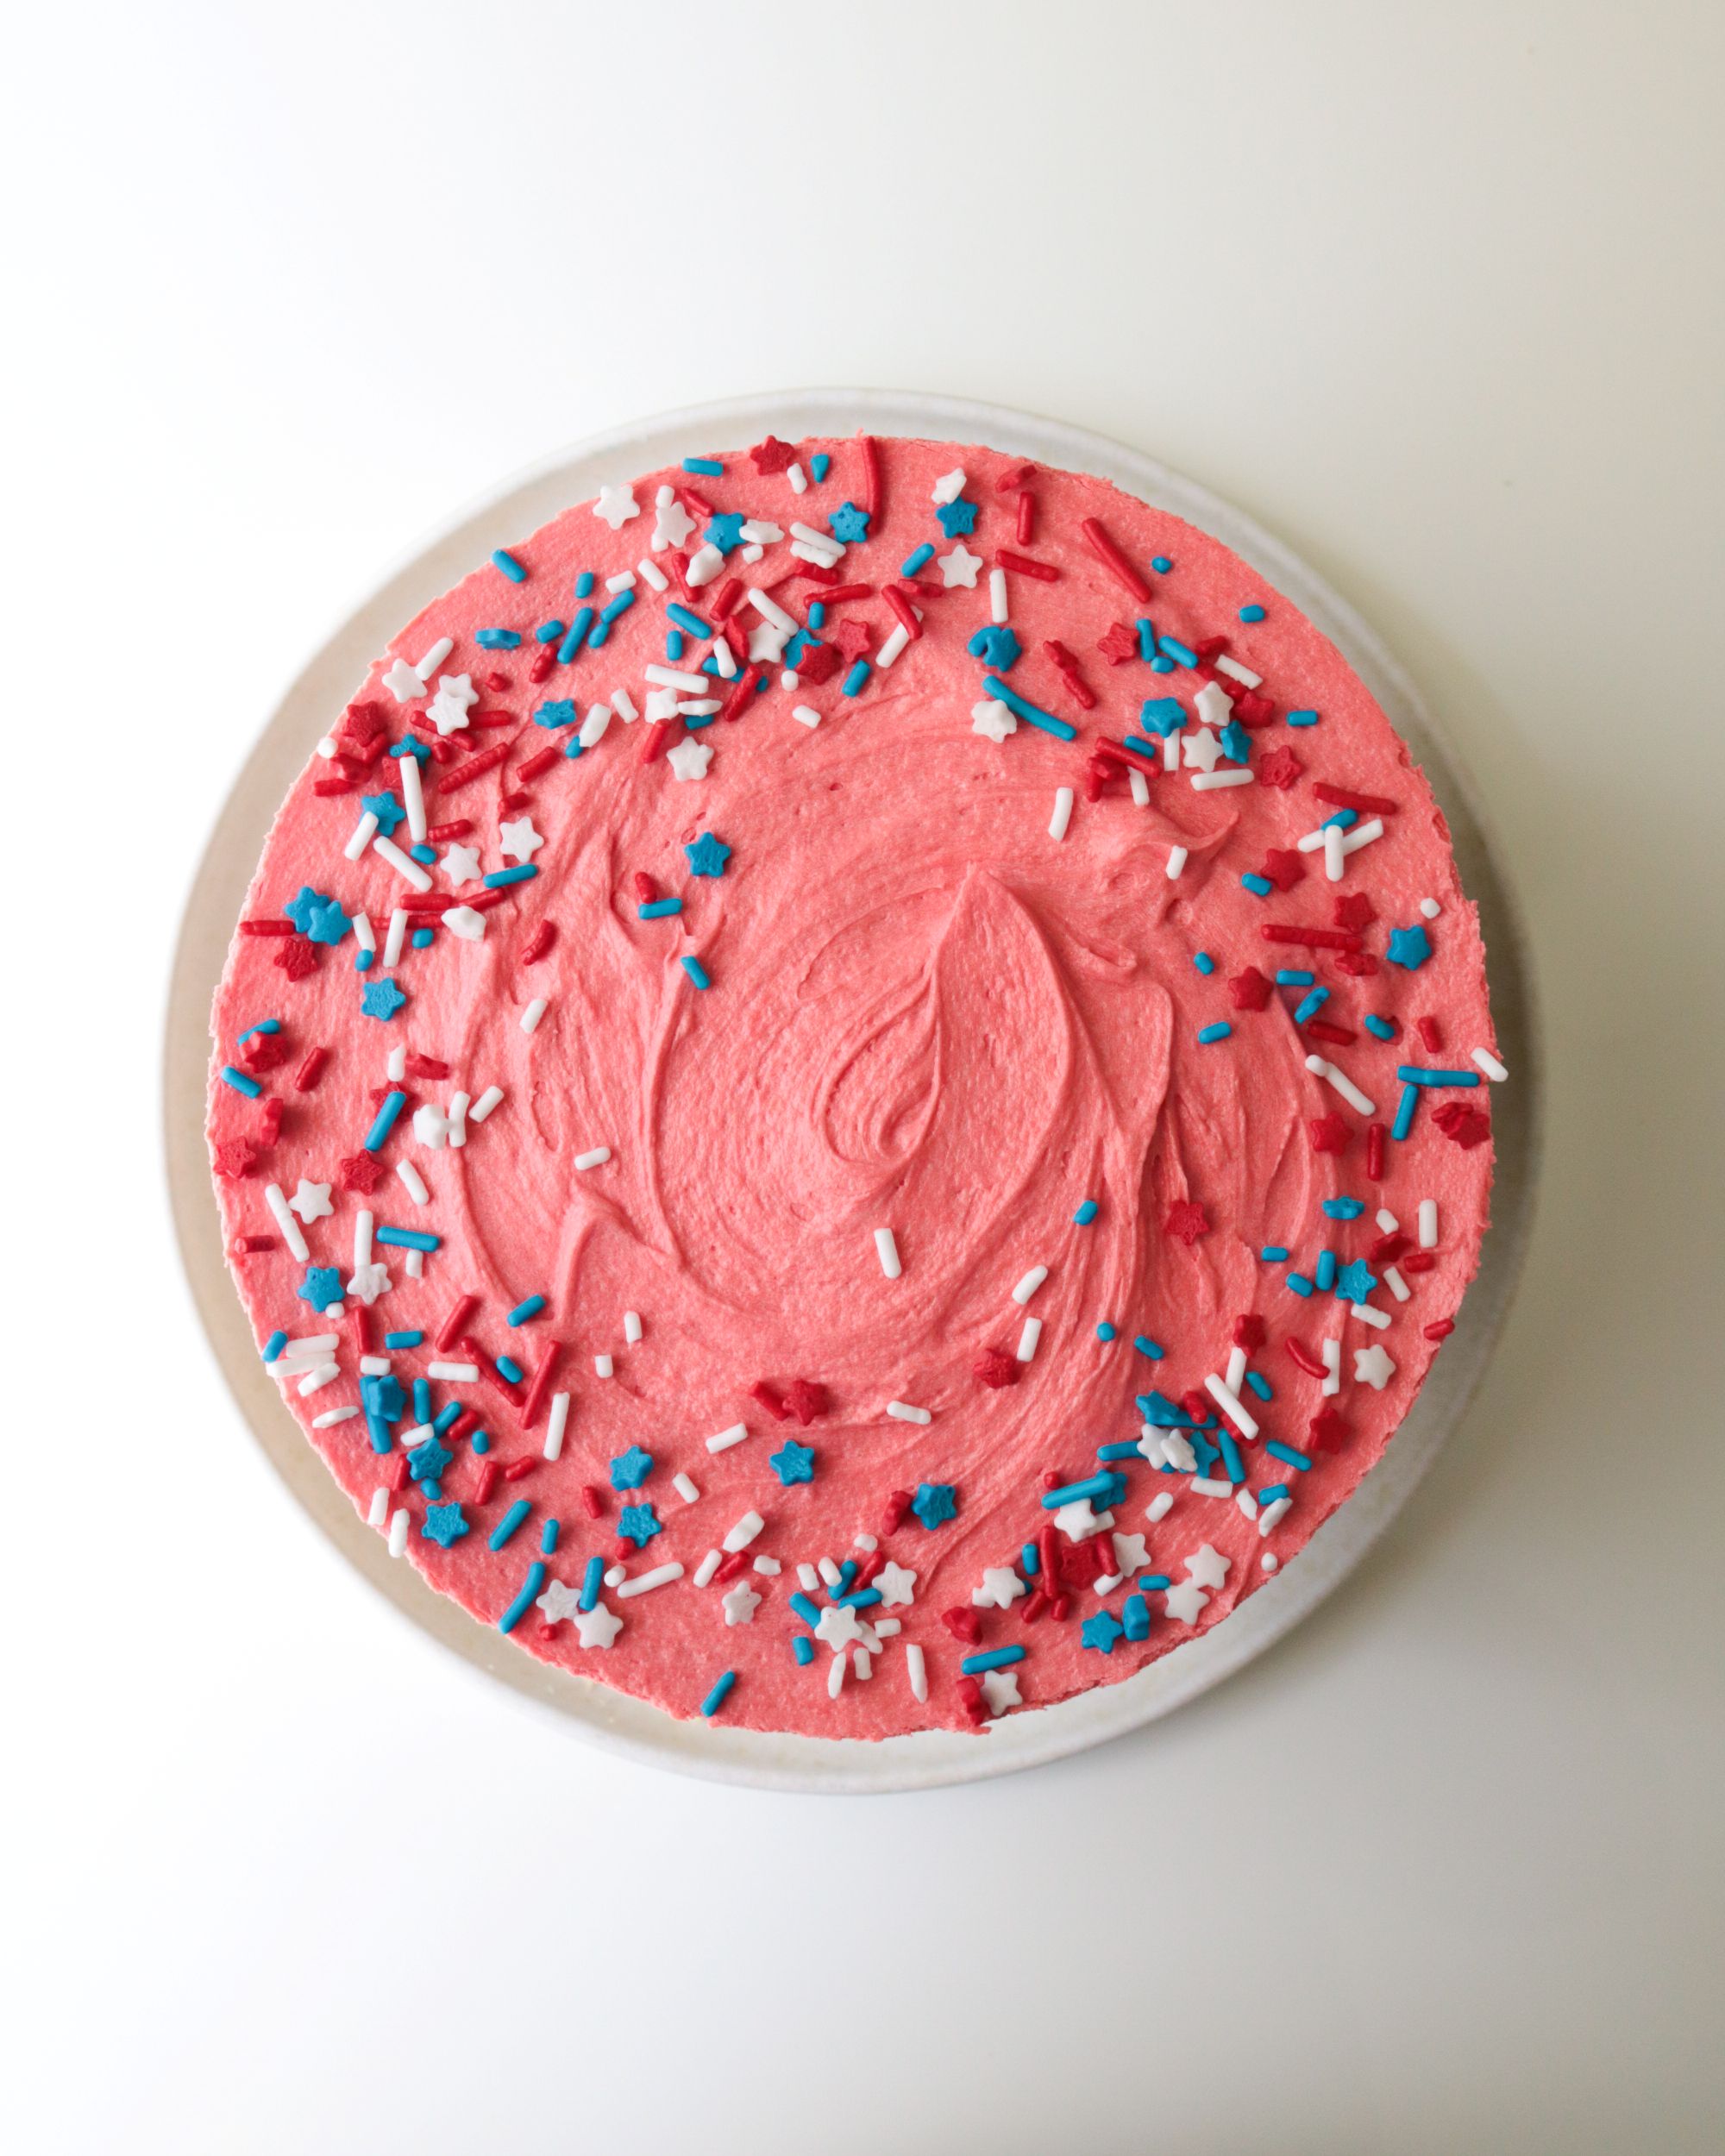
Personally, I’m just delighted that it turned out photogenic! If you couldn’t tell by the excess of photos in this post. When I bake something that looks good… I’m going to milk it. And get indecisive about which photos to showcase.

One more photo for the road.
Happy Birthday America! Thank you for being the land of freedom, fireworks, and Bomb Pops!
Print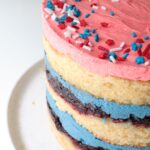
Description
Lemon cake, cherry jam, and blue raspberry crumb and frosting
Ingredients
Lemon Cake
- 1 stick of room temperature butter
- 1¼ cups granulated sugar
- ¼ cup light brown sugar tightly packed
- zest of one lemon
- 3 eggs
- ½ cup buttermilk
- ½ cup neutral oil
- 1½ cups cake flour (or, 1 1/4 cup + 2 tablespoons flour + 2 tablespoons cornstarch)
- 1 teaspoon baking powder
- 1 teaspoon salt
Blue Raspberry Crumb
- 1 cup flour
- 1 tablespoon cornstarch
- 1/2 cup of pulverized freeze dried raspberries
- ¼ cup + 1 tablespoon sugar
- ¼ teaspoon baking powder
- ½ teaspoon salt
- 5 tablespoons butter
- blue food dye, if desired
Blue raspberry frosting
- 1 stick unsalted butter, at room temperature
- 1.5 to 2 cups confectioners’ sugar, sifted
- 1⁄8 teaspoon salt
- 1/2 cup of pulverized freeze dried raspberries
- 1 tablespoons heavy cream
- blue food dye, if desired
Assembly
- 1/2 tablespoon lemon juice
- 3 tablespoons milk of choice
- Cherry jam
Instructions
- Make the lemon cake: Heat the oven to 350°F.
- First, massage the lemon zest into the granulated sugar until fragrant. Then, combine the butter and sugars in the bowl of a stand mixer fitted with the paddle attachment and cream together on medium-high for 2 to 3 minutes. Scrape down the sides of the bowl, add the eggs, and mix on medium-high again for 2 to 3 minutes. Scrape down the sides of the bowl once more.
- On low speed, stream in the buttermilk, oil, and vanilla. Increase the mixer speed to medium-high and paddle for 4 to 6 minutes, until the mixture is practically white, twice the size of your original fluffy butter-and-sugar mixture, and completely homogenous. Don’t rush the process — you’re basically forcing too much liquid into an already fatty mixture that doesn’t want to make room for the liquid. Stop the mixer and scrape down the sides of the bowl.
- On very low speed, add the cake flour, baking powder, and salt. Mix for 45 to 60 seconds, just until your batter comes together and any remnants of dry ingredients have been incorporated. Scrape down the sides of the bowl. If you see any lumps of cake flour in there while you’re scraping, mix for another 45 seconds.
- Line a quarter sheet pan with parchment or a Silpat. Using a spatula, spread the cake batter in an even layer in the pan. Give the bottom of your sheet pan a tap on the countertop to even out the layer.
- Bake the cake for 30 to 35 minutes. The cake will rise and puff, doubling in size, but will remain slightly buttery and dense. At 30 minutes, gently poke the edge of the cake with your finger: the cake should bounce back slightly and the center should no longer be jiggly. Leave the cake in the oven for an extra 3 to 5 minutes if it doesn’t pass these tests.
- Take the cake out of the oven and cool on a wire rack or, in a pinch, in the fridge or freezer (don’t worry, it’s not cheating). The cooled cake can be stored in the fridge, wrapped in plastic wrap, for up to 5 days.
- Make the raspberry crumb: Heat the oven to 250°F.
- Grind up the freeze dried raspberries in a food processor until they’re a powder. Sieve the powder into a medium bowl to get out any seeds. (Use 1/2 cup for this recipe, and save the rest for the frosting.) Add in the flour, cornstarch, sugar, baking powder, and salt. Toss with your hands to mix.
- Add the melted butter and blue food dye, and toss using a spatula until the mixture starts to come together and form small clusters.
- Spread the clusters on a parchment-or Silpat-lined sheet pan and bake for 30 minutes. The crumbs should be sandy at that point. Cool the crumbs completely.
- Crumble any crumb into clusters that are larger than ½ inch in diameter. The crumbs will keep in an airtight container in the fridge or freezer for up to 1 month.
- Make the frosting: In the bowl of an electric mixer fitted with the paddle attachment, beat the butter on medium speed until soft, about 1 minute.
- Add 1.5 cups of the confectioners’ sugar, the salt, and vanilla. Beat on low speed until the sugar is well incorporated.
- Add your freeze dried raspberries, another ½ cup sugar and the cream. Add more sugar as needed to thicken the frosting. Beat on medium speed until the frosting is smooth and fluffy, about 4 minutes. Dye with blue food dye until you reach your desired color.
- Assemble the cake: Mix together the lemon juice and milk for the lemon soak.
- Cut out three 6-inch layers of cake from the quarter sheet pan (example of how to do that here, thank you House of Nash Eats). Using a 6-inch cake ring lined with acetate, start assembling your cake. Place the two half circle in the bottom of the pan, and add in extra cake in the middle if needed to fill it out. Drizzle with lemon soak. Add a layer of cherry jam, and then sprinkle with the raspberry crumb. Gently spread a layer of frosting. Repeat that process with the next layer, and then top with the final layer. On top of the final layer, spread a layer of frosting or decorate as desired with frosting and crumb.
- Refrigerate for 3-5 hours to let everything set before serving. Best served and cut cold.
Notes
Cake and crumb adapted from Milk Bar,